Cardboard walking robot
A while ago I was up in the middle of the night with a baby sleeping on me, deep in a YouTube rabbit hole about DIY electronics and robotics projects, and I came across a very cool design for a simple walking robot made out of cardboard and driven by a CD/DVD spindle motor. Here’s the original video:
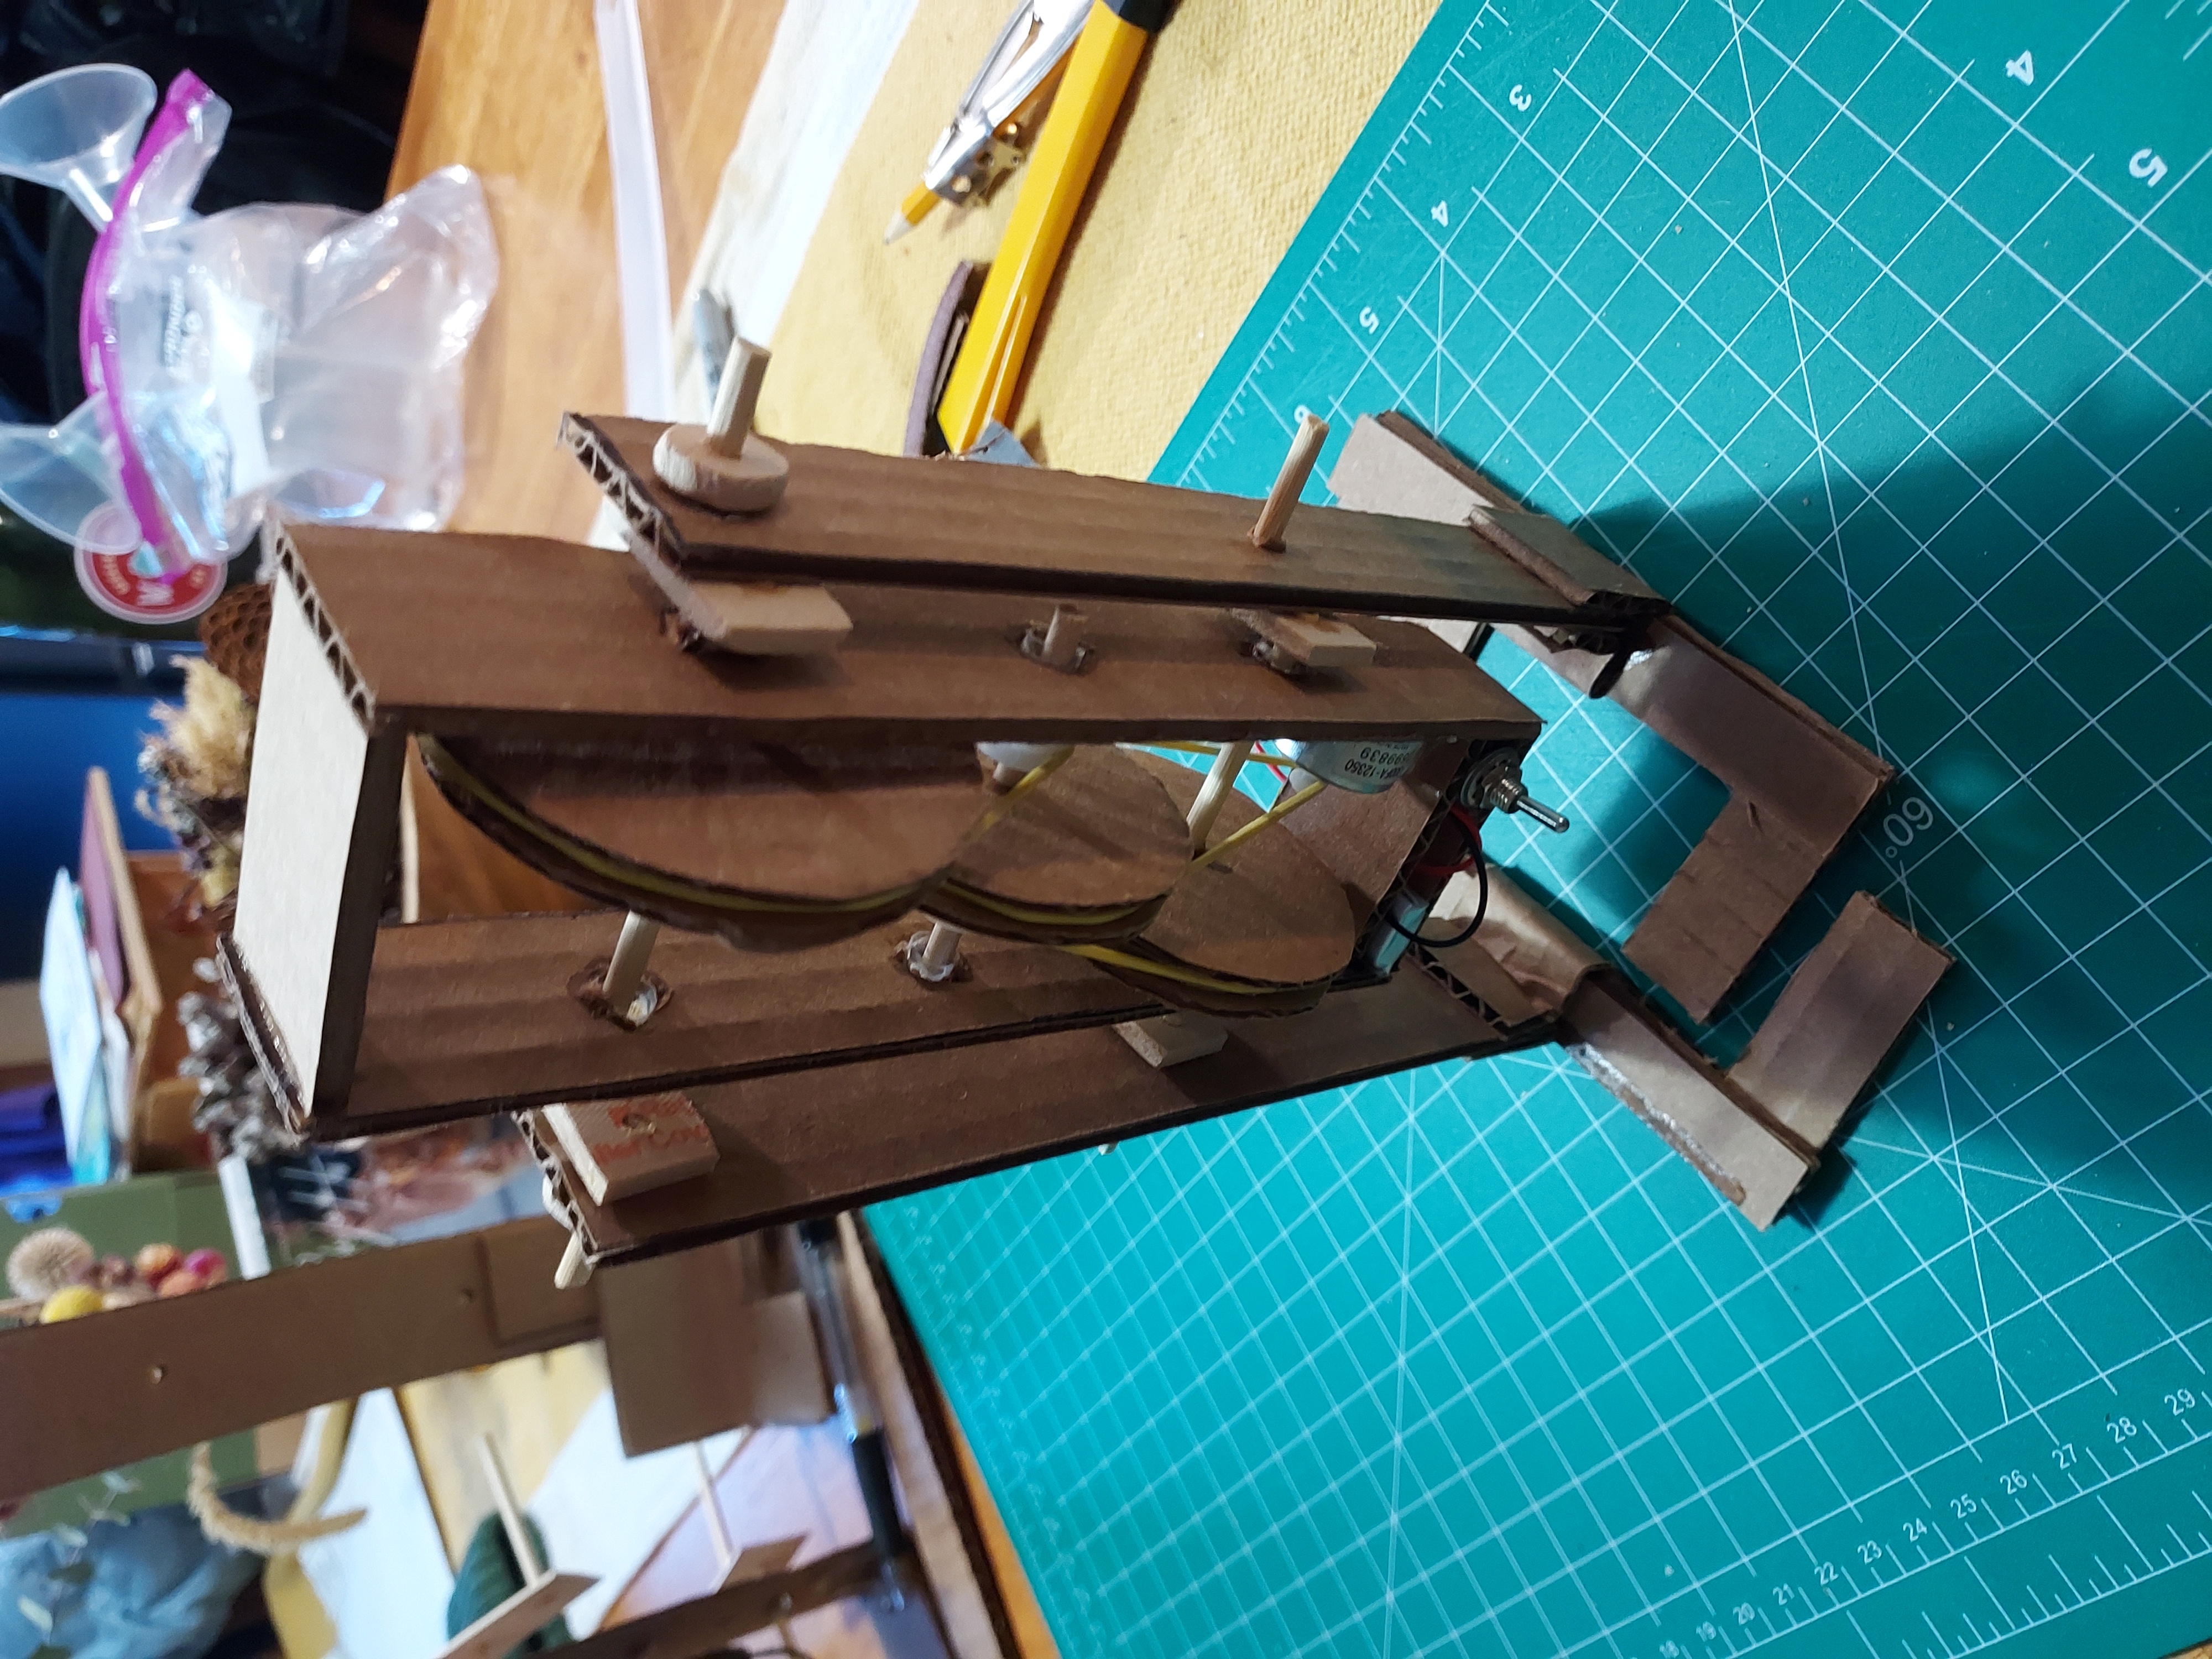
The high-speed motor is geared down in two stages by cardboard-and-rubber-band pulleys to get some torque, and since the motion is rotary and constant the wiring is dead simple - you could probably even get away without doing any soldering, if you wanted
I thought it’d be a fun project and one that my 2-year old might get a kick out of, so I decided to give it a shot. It was not as easy as I thought, so I figured I’d share a couple of lessons learned, in case you want to try to build one yourself.
1. Buy the plans
The original design by “Blackfish” is available for something like $7 on his website and I highly recommend getting them. As I’ll explain, there are a couple of somewhat tricky parts to the design. I completely rebuilt it twice trying to reverse engineer it before I gave up and bought the plans, and then it worked fine on the third attempt.
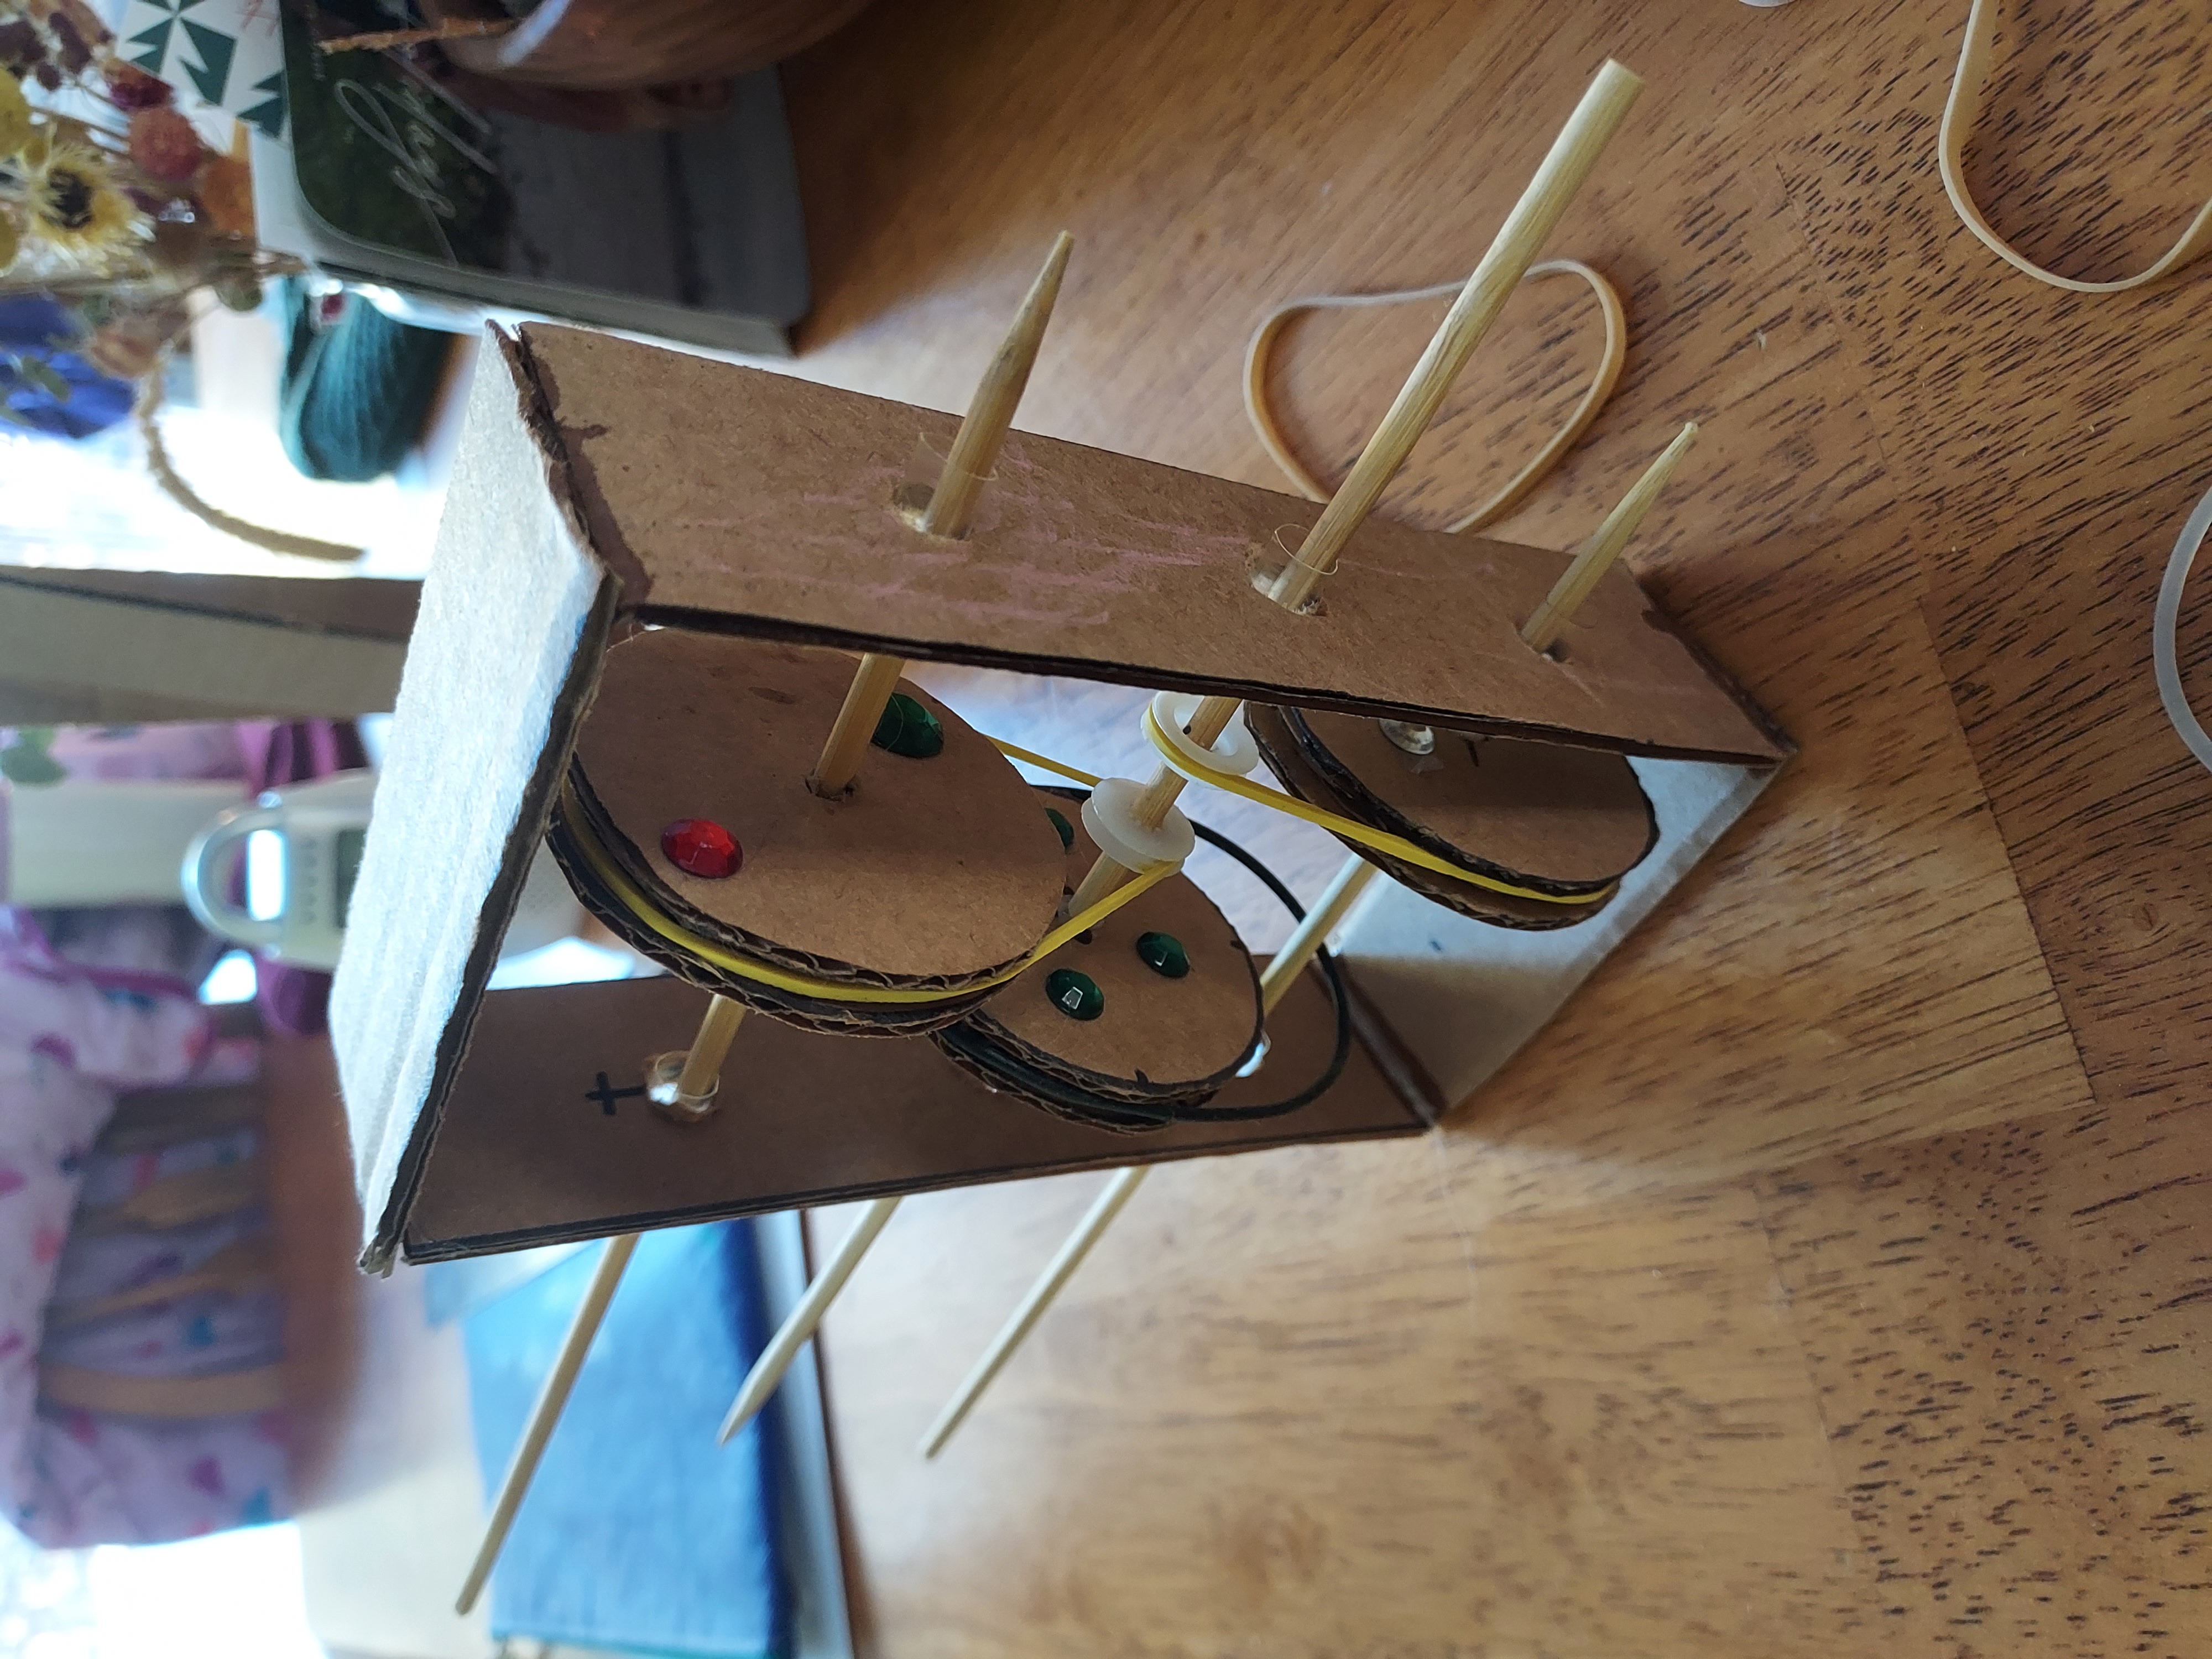
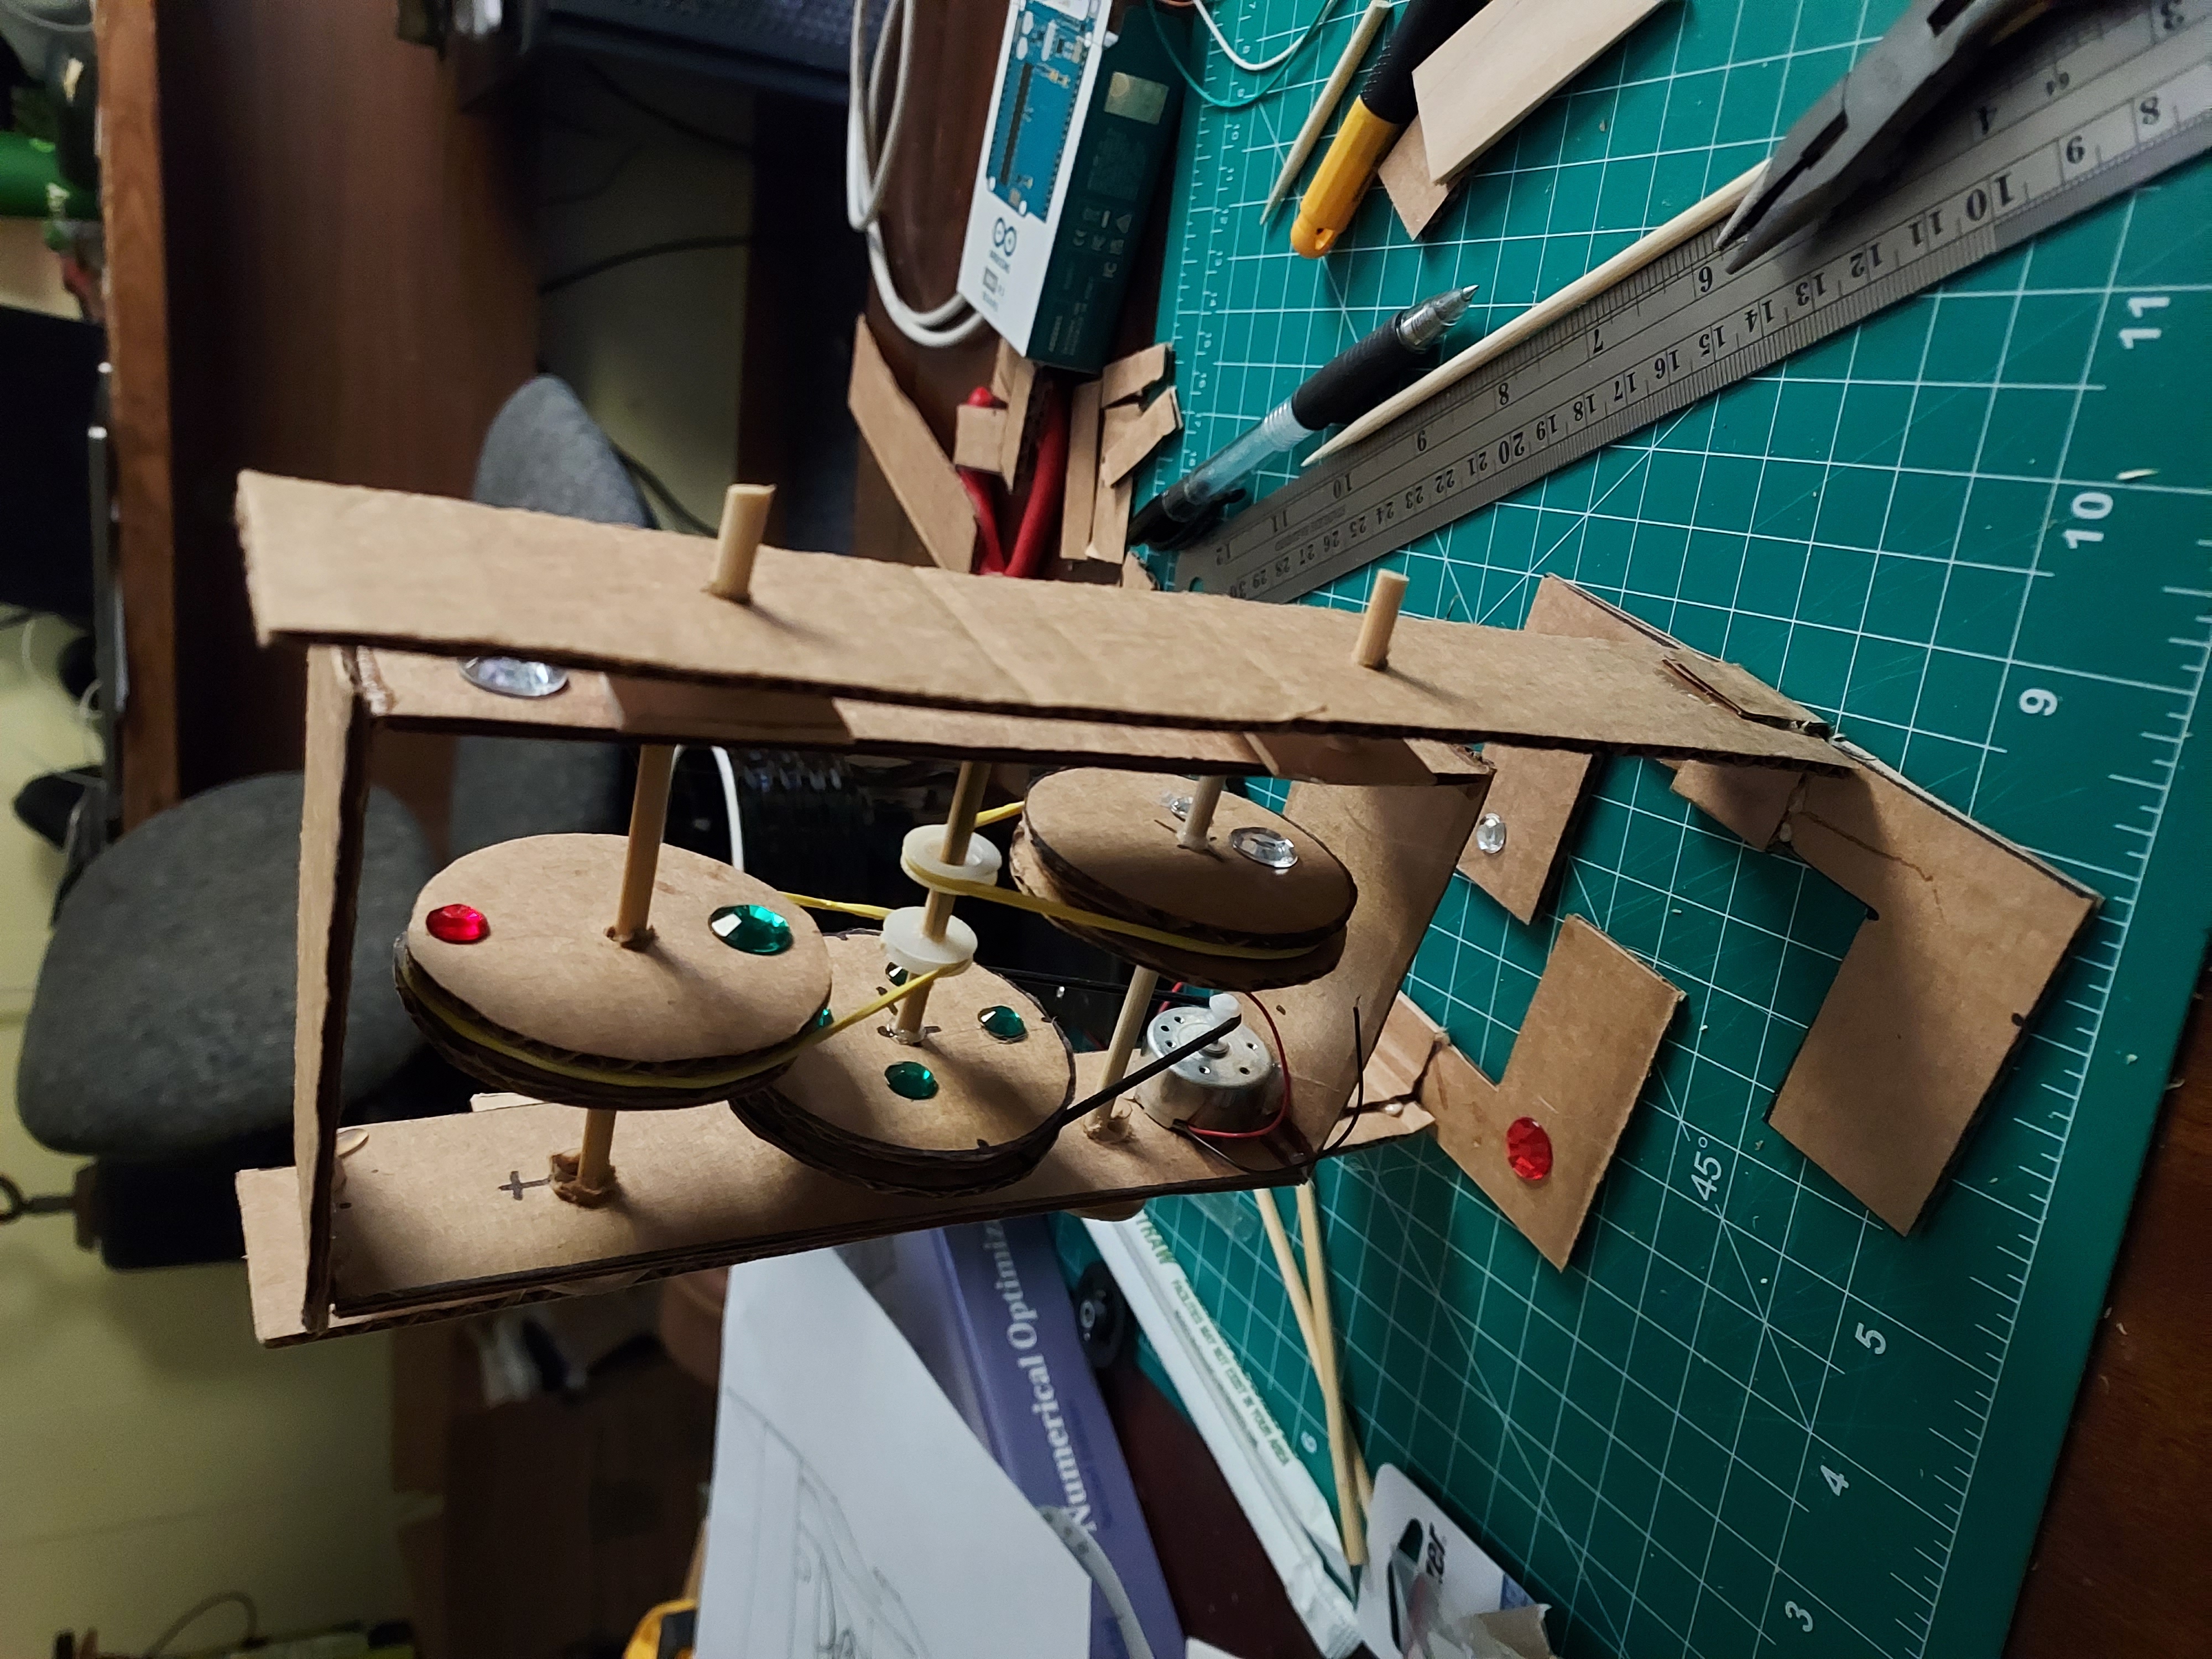
One of the most important things is the different thicknesses of cardboard for different components, which I didn’t even consider in my first attempts.
2. Static stability
Most walking robots have to be carefully designed and controlled to remain stable. Others, most famously the Boston Dynamics robots, lean into instabilities to perform acrobatic, natural motion. The clever thing about this design, at least to me, is that it is statically stable, meaning that no matter where in its “gait cycle” it is, you can turn the motor off and it will stand still. This means that you don’t really need any kind of controller or feedback stabilization; just a battery, a motor, and an on/off switch.
On the other hand, achieving that stability is a bit tricky - this is what I got wrong on my first attempt. The critical dimension is the “shoulder width”. The wider the robot is, the more it’s cantilevered on one leg, and the more torque is exerted about the ankle. So better to build the torso as narrow as possible and still have room for all the components.
3. Cardboard sucks
When I started building this I thought, “What a great idea! I’ll prototype all kinds of stuff with cardboard.” By the end I thought, “I’m never building anything out of cardboard again.” By its nature, cardboard is pretty unforgiving. The corrugation adds some stiffness in one dimension, but not the other.
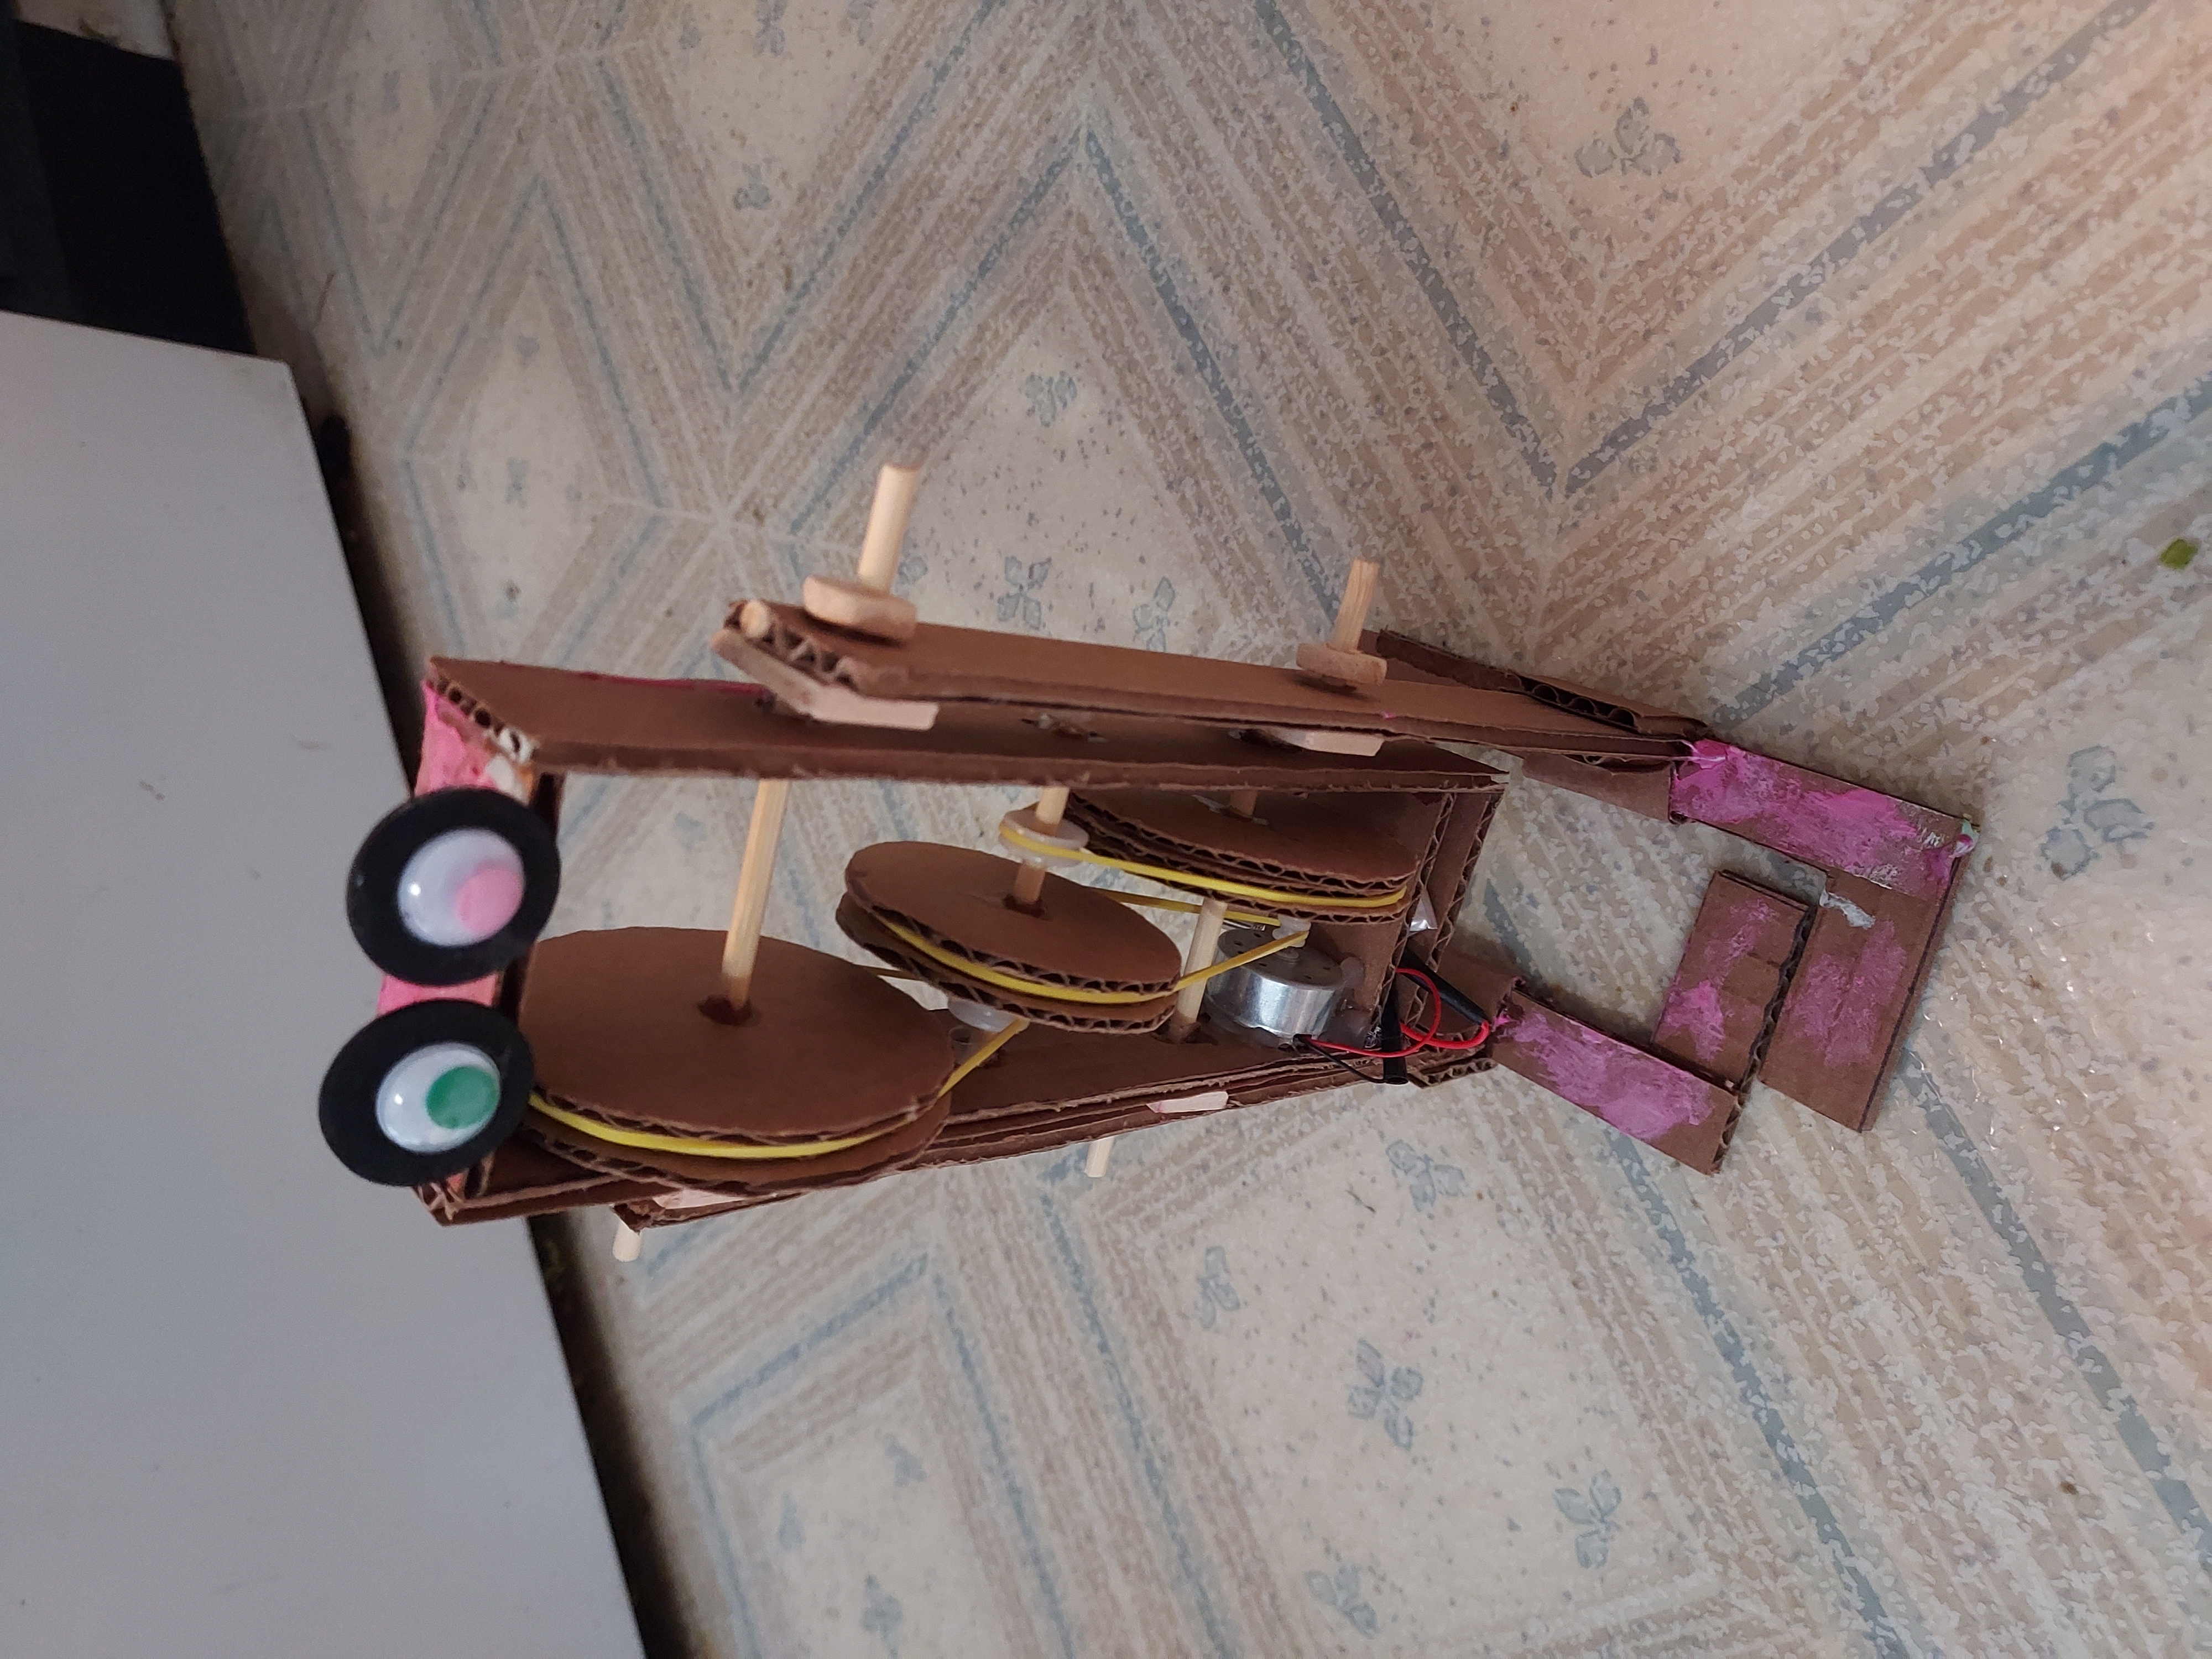
In either direction, if you look at it wrong it will crease and then never be stiff again. My daughter was playing with him and put him in the Baby Bjorn because “he needed to take a nap”. His foot got stuck, the leg bent, and he’s never been able to walk unassisted since. I’m just glad she had fun with it, but if I was ever to try rebuilding again I’d probably go with something like MDF.
The other trouble I had with materials was the popsicle sticks for the offsets on the axles. I found it was kind of tricky to keep everything square when gluing those up, so I ended up cutting pieces off a paint-stirring stick like you get for free from Home Depot with a gallon of paint.
Parts list
There are more details on the plans, but some of the links to AliExpress and such are broken, so here’s what worked for me. I got most of it from Adafruit. With this list it’s all less than $50, and you can probably come up with cheaper or free substitutes for many things (like the pulleys).
- Plans ($7)
- CD/DVD Motor ($2)
- 3.7V LiPo battery ($6)
- LiPo charger ($6)
- JST connector ($1)
- SPDT toggle switch ($2)
- Plastic pulleys and belts ($12)
- Cyanoacrylate super glue ($7)
- Bamboo kebab skewers
- Paint stick
- Hot glue gun
- Finger paint, stick-on jewels, and googly eyes (optional, but recommended)
Good luck!